Hardwired sensor network utilizing obsolete CAT6 infrastructure

There is no need for a multiplexor

If you use an Arduino Mega it has enough digital ports that every sensor can be connected to its own individual digital input on the Arduino - and indeed as you are running over cable that is already punched down then this would be the cleanest way

A multiplexor is only going to add complexity to what you are trying to achieve for no benefit as all the cables come to a central location which is the logical place to also put your monitoring system.

Craig

1 Like

The max14661 analog multiplexor is indeed useless, most likely actually harmful.
I believe the OP needs something ds2482-100 based ("Single Channel 1-Wire Master") or ds2482-800 (8-channel version). This chip is a customized driver. It has slew rate control which is very useful for long runs. The OP didn't mention how long the longest run is, but I wouldn't be surprised if it were close to 100m. At that point reflections start to become "interesting". Also, the OP doesn't seem to be familiar with Arduino. The ds2482 chip has a linux driver, which means the sensors could be read with simple bash/python/... scripting on a rPi. I don't know whether there's a simple breakout board for ds2482 that could be used...

1 Like

Yep - i guess he has a couple of options now - i believe he did say the distance of the longest run in a previous post - the arduino approach is easy and well known and documented all over the place - not so sure about driving the 1Wire master from the Pi - but i guess we would all be able to help him through if thats the approach he wants to take

Craig

1 Like

Well, I've stopped considering different alternatives. I'm awaiting an answer from UniPi, but regardless of their input, I've decided to go with a Arduino Mega with Mega IO Expansion Shield! :grin: .. If the expansion Shield gives the Arduino that many separate ports, it wouldn't only solve our immediate problem, but also offer the opportunity to add more sensors and stuff. :innocent:

I need to get my hands on some Arduino Mega so I can get acquainted with it, as well as a Knipex RJ45 Crimping Tool, cables and stuff. Probably need a mount, cables and screws etc. I'll see what I can order locally (Online stores in Norway). I also need a place to put my Node Red. I'll keep you updated! :blush:

1 Like

So. My original desire to use Raspberry Pi, was that I could install Node RED on it. And then, if I had a card/expansion/hat I could connect to the Pi, so that it would have lots of ports (so every sensor could have its individual port), I would have minimized the devices going into the project.

Now, using arduino, the Node RED would have to be running somewhere else. I could use AWS (as I've been doing until now), other web services or even using Arduino IoT Cloud (probably would need a subscription, idk). This somewhere else could also be on the premises - i.e. a local Node RED running on a Raspberry Pi. What would be the pros/cons of the different setups?

That is quite generous, thanks, I'll see what options I have. What version are the Ethermegas?

Personally, I would strongly recommend using a local Pi. Keeps all the traffic safe and local, you don't have to worry about an Internet issue causing data loss. You can always use AWS/Azure or whatever later on if you needed it. But the cost of a Pi with power and some kind of case is tiny and with the exception of replacing the boot SD-Card every few years, will be very reliable. Just make sure that you have reliable power to the Pi (and yes, worth testing at the Pi because some power cables can drop voltage badly) and get a decent size and make of SD-Card (I recommend 32GB Samsung Evo or Evo Pro) giving plenty of room for wear levelling (which not all card makes will do but Samsung certainly do).

3 Likes

I will have to check on the version (did not even know they had versions !!)

I have had them for about 3 years or so now.

Will let you know

Also agree with Julian about a local device - however being a school you would probably have some retired small form factor PCs that could be repurposed (as the PIs are in short supply) - put an SSD in and old PC and you are good to go

Craig

1 Like

@henxan
In still a newbie here, but here is my 2 cents.
First, besides myself, everyone who replied in this post are amazing, smart, and helpful people, they have helped me alot

  1. The falls one wire temp sensors are an amazing asset to temp readings. However set ups are picky. If you are connecting a bunch to one input(as they are designed) to have the most stable communication you need to plan on wiring in parallel, star topology is generally not recommended but can still be achieved.

I use them with an esp8266 that i have flashed Tasmota on.
To simplify setting them up in a huge building. You should utilize the cat 6 ethernet to run poe to each room.
Using poe to power the esp8266
You can then send mqtt message to and from the tasmota esp8266 to nodered for desired display output.

Generally you can buy a 5 pack of one wire sensors and they come with the proper pull up resistor (4.7 K o) maybe around 10 us dollars
You can buy a 5 pack if the esp8266 for about 20 bucks.
I use terminal block hats so i have good connections.
The one wire sensors usually have a yard or less of wire from them. I use phone line wire to extend them. Because of extending the wires, i don't recommend relying on the 2 wire parasitic connection(sorry if I'm spelling that incorrectly)
There is enough gpio slots on the esp8266's to connect temp sensor, control temp sensor, and alot more things. Heck you can have a light sensor to tell you if the lights are on in a room.

Here is a picture of control box i made for a beer fermenter using the Dallas one wire.
Now because i don't have poe available my boxes are plug in units and i have an outlet in the box to give power to esp8266 and to give power to a solenoid valve that controls the glycol going through a jacket on fermenter to control the temp of beer i have fermenting

Using an esp32 or an esp8266 in this fashion allows for a simplistic modular approach. You can honestly set up one room at a time. You make the flow the way you want it for a room. When you do second room and so on, you copy your flow but change the info to communicate with the proper device .
You can simply when seeing up an esp8266 with tasmota label each one with any easy identifier. (Rm1400, rm2400) make sure though the identification makes sense to you and whomever is working with you.

I'm out of town on business trip (GREAT AMERICAN BEER FESTIVAL) I'm being forced to drink other people's beer.
I am working on a video tutorial on how to flash the esp8266 to simply how to use for temp and pressure , i should have that done next week. And i can share flow i use for my fermenters.
My remondation, downs 40 bucks buy the one wire sensors, but a5 pack if esp8266 get a project box and set up to monitor one room. Learn how to wire and wire flow. I've you have that down you will know if it's the right application or not. If it isn't you only spent 40 bucks that's it.
Here is screen shot of control of fermenter in my dashboard, also screen shot of my display only tab(no controls) in my dashboard . My temps are from one wire sensors, pressure gages are from pressure sensors with a 16bit analog to digital converter connected to esp8266 with tasmota


Yes my brain is scattered, but honestly thanks to everyone here that contributed its scattered with planned chaos now.

2 Likes

Hi again!

I've thought about our setup a little bit more. If it is possible, I've decided to go with only a rPi 4 w/Sequent Microsystem stackable HAT. Can anybode here confirm if this alternative is equal to the Arduino mega route?

Another problem, which I had not foreseen: the market is running out of Raspberry Pis. wtf :dizzy_face:

So, I have to order one now, to have a system up and running before winter sets in. At the moment, I can only procure the 4BG version of Raspberry Pi 4B, not the 8GB.

Will the 4GB version be sufficient, considering I'll be running Node RED, InfluxDB, Grafana as well as communicating with the sensors (as well as being future-proof, for adding at least another HAT, even managing ESP32 or equiv.)? :innocent:

The 4GB will be fine if you can get one

As to the RPi Hat - that SHOULD work - but you are going to give yourself the added issues of needing to manage and intergrate the i2c interface between the Pi and the HAT and then work out how to pass commands across to each of the ports for reading etc

I would imagine you would also need a seperate power supply for that HAT as it supports different input voltage levels so must have so form of Voltage supply management on board.

Before you go ordering that HAT i would do some searching around to see if you can find anyone who has done what you want to do - you are obviously (not being rude) a novice at all this - so you are making the learning curve steeper if you need to learn the use of the i2c hat and then interpreting the data coming in from the sensors - it might be easy - but it might not also - the devil is in the details

Craig

2 Likes

Another option you might like to consider is to use a Wemos D1 Mini (ESP8266-based microcontrollers) connected to one or more DS18B20 temperature sensors. These devices are inexpensive and available from a number of suppliers (AliExpress, Banggood, Amazon, etc..) and best of all WiFi-enabled.

I seem to remember you said there are access points (APs) around the school which means each Wemos could join a local AP. If these APs are still active and working, then this could be a quick, easy and fairly inexpensive solution for you.

Each Wemos can be flashed with various flavours of firmware (ESPeasy, ESPhome, Tasmota) which support various peripheral devices including the DS18B20.

You could also run Node-RED at some central position using a Raspberry Pi or a PC where you could process (e.g. display and/or save) the temperature readings received from the various Wemos devices.

Room Temperature Display
I've designed and built a number of Room Temperature Display (RTD) units that are deployed around my house and in my garage. Each RTD has a DS18B20, a photo-resistor, an OLED panel and a Wemos D1.

As well as reporting the temperature and light-level readings to Node-RED via MQTT, the rule-set within ESPeasy drives the OLED panel where the current time (9:10 hrs) and temperature (17.6 deg C) and the IP address of the RTD is displayed. There is a programmable Max and Min set-point (SP = 30 / 18). The current temperature is compared with the Set Points and used to operate one of three LEDs. As you can see the current temperature is below the Min set-point, so the blue LED is illuminated to indicate the room is too cold. The second row from the bottom on the OLED panel shows the light level ratio (381 / 1024).

4 Likes

So, an update!

I've been exceptionally busy lately, with lots of extra work, unscheduled repairs and such. However - I've finally gotten my hands on a Raspberry Pi 4 model B. At the moment I'm awaiting Raspberry Pi original usb C power supply and a samsung 128GB endurance microSD-card. I've already gotten the TinkerPlate from PiPlates, a strip of DS18B20+ and I've got a bunch of resistors of different values.

Now I'm using an hour of available time of planning setup of my Raspberry Pi 4 model B, and there are several questions arising. As I wrote earlier in the thread, I did not get the 8BG version, as I was too slow to order, but I got the 4 GB version.

My plan is as follows, with questions:

  • Using Raspberry Pi Imager to format microSD-card to FAT32
  • Using Raspberry Pi Imager to install Raspberry Pi OS 64 Bit version
  • Updating Raspbian using Configure -> Raspbian -> Update manager with option "More packages"

Then comes my first question. Since I got the 4GB version, I see some people recommending using the zram RAM-compressing, as this supposedly reduces the wear of the microSD-card. Can anyone confirm this? If yes, how should one go about installing/enabling zram? There are as many ways of installing zram as there are guides - they all seem to be a bit different.

  • Next I'll be installing/upgrading Node Red
  • Installing InfluxDB package - as described in this link.
  • Installing Grafana package - as described in this link.
  • Enabling SPI and installing package for PiPlates Python modules as described in this link.

Are there any specific precautions or recommendations I should pay notice to while doing this? Are there a specific order I should install and/or update/upgrade?

  • In Node-RED, install palette node-red-contrib-pi-plates, which gives control of the TinkerPlate for PiPlates, as described in this link.
  • In Node-RED, install palette node-red-contrib-influxdb (I've looked on several sources, maybe something like in this link for the setupe of both influxDB and grafana.

Also, please comment if you I have misunderstood or missed something :blush: :innocent:

post edited to link to source documentation for installing InfluxDB

Are you going with influxdb 1.8 or 2.x?

1 Like

Why not go to the source documentation?

1.8: Install InfluxDB OSS | InfluxDB OSS 1.8 Documentation (influxdata.com)
2.5: Install InfluxDB | InfluxDB OSS 2.5 Documentation (influxdata.com)

Always go to the source docs to start with. Use blog posts if something isn't clear but always check the date of the post first to make sure it relates to the current version of your app.

1 Like

and

Absolutely, I wish to go with the source documentation - thanks! I'll edit my post to reflect this :blush:

So, an update and some questions :innocent:

I've had practically zero time to work with my temperature monitoring since I got the parts. I had a couple of ours a couple of weeks back, and today I got some time.

Setting up the Raspberry Pi 4 B with along with the Tinkerplate from Pi-Plates, was easy enough. Installing both InfluxDB and Grafana was not that hard - though I may have gone about it the wrong way. Well, at least it is all working.

I'm still at the testing stage, and have gotten to the point where I receive temperatures from a DS18B20+ -> using NodeRED I send the data to InfluxDB -> Grafana fetches data from InfluxDB -> I've used an Alpha-feature in Grafana to publish a public dashboard -> I'm using a DDNS service to expose the grafana dashboard to the web -> I've created a subdomain for my school, such that I only need to type "temp.[myschool].no" to see the chart.

Great - so far!

I'do recognize the problems with exposing the grafana server online - and the way I'm doing it now, is only for testing purposes. I also understand that I'm probably doing things all the wrong way, but such is life :innocent:

But, over to my most pressing question:
How do I fetch two temperature measurements from InfluxDB? I'm using the "Flux" syntax. At the moment, I'm using this, a result of heavy cutting-and-pasting with some edits:

from(bucket:"tempdata")
|> range(start: -100h)
|> filter(fn: (r) => r._measurement == "TemperatureTest" )

The reason for the chosen values, is that my InfluxDB-node in NodeRED says:
Skjermbilde (81)

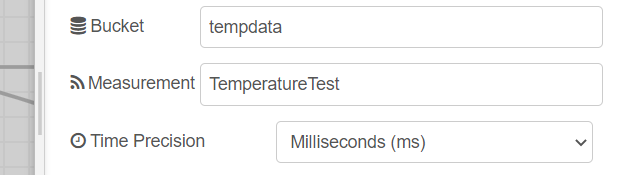
Grafana displays nice, with the one value. However, I've created a secondary value, which is sent from nodeRED to "TemperatureBest" in the same "tempdata"-bucket.

How can I modify my flux syntax in Grafana to diplay both TemperatureTest and TemperatureBest values? :innocent:

That isn't anything to do with node-red, it is a Grafana question. I haven't used it yet with influx v2 and flux, but each line on a chart comes from a separate query, so I am not sure where the problem is.

1 Like

So, finally had an hour to sit down with the rPi. Then, a colossal problem arose - a problem I knew of, but I just hadn't connected the dots:
Running a temperature logging over Rpi, with a microSDcard, is extremely problematic when the power goes out :tired_face::tired_face::tired_face:...Now I've got green blinking light, corrupted sd-card.

I do not want to start over again, and get to this point again, because the power does go off regularly, where I'm planning on placing the rPi. So, what should I do?

Will a rPi running off a USB stick be free from the data corruption problem?

Do anyone here have advice on a reliable way I can have my rPi handling sudden powerdowns and still boot up and resume nicely? :innocent:

No. a USB memory stick will almost certainly be slower and more fragile!
On the other hand, a USB3 connected SSD is a significant upgrade for a Pi 4

You can find lots of discussion on the Raspberry Pi forum about this, but things you might consider include:

Make the boot and root filesystems read-only. Raspberry Pi OS has options in raspi-config to do this via the "overlay filesystem"
Obviously you can't run a data logger read-only, but you could have a read-write filesystem, for the data, possibly on a USB drive. That would not be immune to damage from power outages but much less fragile than the OS filesystems.

Use cloud or network hosted databases, message brokers etc

Have a rigorous automated backup scheme.

I think I saw a thread here recently on high-availability Node-Red setups.

2 Likes

Of course you are taking regular backups to recover from…right??

And getting a UPS would be helpful

2 Likes