Questions on node-red-contrib-ui-svg

Hi all,

I'm no expert in these things, but having some fun with the whole smart home / IOT thing.
I haven’t really done much coding since I left high school, I wouldn't like to say how long ago that was but we used punched cards (really!)

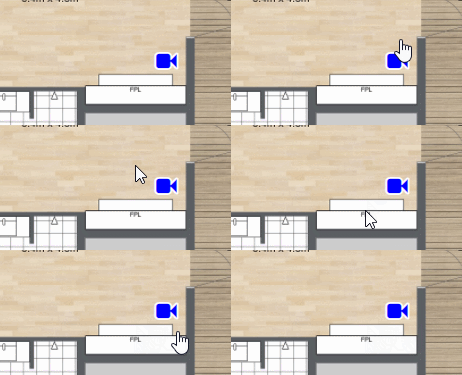
I'm using this node to create a floor plan of my house, to keep things simple I have different floors outbuildings etc on the one screen. Unfortunately however I try, the icons end up small and its very hard to click them using a touch screen.

I can think of two work a rounds and may need both.

One could be to increase the selection area of the icon with some kind of invisible boarder if this is possible?

The other is to have some preset zoom levels to a particular part of the plan, ground floor etc. Is there a way to do this. eg click something and the view zooms in to a particular area and another click to restore back to full view.

I imagine I'm not the only one with this problem so if anyone has any ideas I would be grateful.

Sean.

Morning Sean,

It is nice to hear that you don't need to spend 24 years in university to get a floorplan in Node-RED running :wink:.

Another solution that pops up in my head: if your icons are much smaller as your fingers, you could put a largeer(invisible) circle above each icon. And then attach a click handler to the circle (instead of the icon).

But are the icons your only problem? Or is everything too small, because all your floors together are just consuming too much space on your screen? Because I will have the same problem in the near future. You don't have a series of buttons where you can select your floor, or a floor per tabsheet or ...?

BTW interesting questions!
Bart

1 Like

Here is some stuff to get you started:

  1. You can start with a circle below your icon, which allows you to nicely center your icon inside the circle:

    <svg xmlns="http://www.w3.org/2000/svg" xmlns:xlink="http://www.w3.org/1999/xlink" preserveAspectRatio="none meet" x="0" y="0" viewBox="0 0 900 710" width="100%" height="100%">
      <rect id="svgEditorBackground" x="0" y="0" width="900" height="710" style="fill:none;stroke:none;" />
      <image width="889" height="703" id="background" xlink:href="https://www.roomsketcher.com/wp-content/uploads/2016/10/1-Bedroom-Floor-Plans.jpg" />
      <circle id="cam_living_circle" cx="690" cy="280" r="40" fill="red"/>
      <text x="690" y="280" font-family="FontAwesome" fill="blue" stroke="white" stroke-width="2" font-size="35" text-anchor="middle" dy="0.10em" alignment-baseline="middle">fa-video-camera</text>
    </svg>
    

    Since your browser will start drawing your SVG elements by reading your SVG source from to to bottom, it will look like this:

    image

  2. Once you have centered the icon in the middle of the circle, you need to draw it on top of the icon (to make sure it will capture all events). Which means you need to move the circle after the text. Make the circle invisible (via visibility="hidden") and specify that the hidden circle still needs to capture mouse events (via pointer-events="all"):

    <svg xmlns="http://www.w3.org/2000/svg" xmlns:xlink="http://www.w3.org/1999/xlink" preserveAspectRatio="none meet" x="0" y="0" viewBox="0 0 900 710" width="100%" height="100%">
      <rect id="svgEditorBackground" x="0" y="0" width="900" height="710" style="fill:none;stroke:none;" />
      <image width="889" height="703" id="background" xlink:href="https://www.roomsketcher.com/wp-content/uploads/2016/10/1-Bedroom-Floor-Plans.jpg" />
      <text x="690" y="280" font-family="FontAwesome" fill="blue" stroke="white" stroke-width="2" font-size="35" text-anchor="middle" dy="0.10em" alignment-baseline="middle">fa-video-camera</text>
      <circle id="cam_living_circle" cx="690" cy="280" r="40" fill="red" visibility="hidden" pointer-events="all"/>
    </svg>
    
  3. Then apply the click handler to the circle (instead of to the icon):

    image

Now you will see - by looking at the mouse cursor changing - that the clickable (circle) area is much bigger, compared to the icon:

svg_extend_clickable_area

Hopefully this can help you to solve your problem ...

Thanks I will give that a try.

I would like to keep the full floor plan idea as it makes it easy to see every device state in one place.

Regarding the zoom I notice that a double tap zooms in by "some" amount, can that be set to another amount ? Also is there some option to reset back to "normal" view. The pinch and zoom / move can be a bit difficult to get everything back to where it should be.

Can this "viewport" be specified programmatically by some external action. e.g. a payload with co-ordinates for a rectangle, which would then fill the screen ?

I will try to explain some possibilities to handle multiple floors on a smaller screen:

Replace the entire SVG source

Since version 2.1.0 of the SVG node, it is possible to replace the entire SVG. So when you select - e.g. via a button on your dashboard - to show the floorplan of another floor, you could inject a message containing the SVG for that new floorplan. And then that new floorplan will be displayed.

However then you will have to reinitialize your entire SVG every time. I mean e.g. something is blinking on your SVG, then you will need to inject messages - after a switch to another SVG - to make sure the status of every SVG element in your dashboard is re-synced with the server side...

Use multiples SVG nodes

Use a separate SVG node for each floorplan. Then you have to make sure you can somehow select in the dashboard which of those SVG drawings needs to be displayed: tabsheets, collapsible groups ...

For example the collapsible groups might be interesting because multiple floors can be displayed simultaneously, e.g. for dashboards being displayed on a larger screen somewhere in your house.

Use the build-in CSS zoom feature

You could create one large SVG drawing,containing the floorplans of all your floors (all next to each other).

image

And when some floor is specified on your dashboard, send a message to the SVG node to pan/zoom automatically until only the selected floor is being visualized. Use the build-in pan/zoom feature for this purpose.

Note that it might involve some trial and error to get accurate pan/zoom settings. And take into account that users also might start panning/zooming, which means your other floorplans might become visible...

Use layers on top of each other

You could create one single SVG drawing where you draw all your floors on top of each other:

image

Then you don't need to start panning/zooming. As soon as another floor is being selected in the dashboard, you need to make sure that only that floor is visible. The other floors need to be invisible, otherwise you will see all floors crossing through each other ...

Note that most SVG editors will have a layer manager, to make sure you can draw layer by layer. This feature is also available in DrawSvg, the editor which we have embedded inside the SVG node:

Note that each layer will correspond to an SVG group element, which will contain all the SVG shapes of that layer:

image

So you can easily hide or show floors in your dashboard, by simple injecting messages that set the visbility attribute of those groups (visible or hidden).

A disadvantage is that you can never show all floors at once in your dashboard.

Use the SVG viewbox to pan/zoom

Similar to the CSS pan/zoom option, we will create a single SVG drawing containing all floorplans next to each other. By changing the viewbox of the SVG drawing you can pan/zoom on the drawing, to have only one of the floors visible:

The viewbox simply defines which part of the SVG drawing you want to see. See for example here for more information.

I think this might be a very powerful option, since you can also show multiple floorplans at once.

However I have never tried it, so not sure whether it will work at the moment:

  • Not sure whether you can already change the viewbox via input messages. Need to have a look at that.
  • Not sure whether it will work correctly in combination with the CSS pan/zoom feature. Need to test that.

Ah had not seen your new questions. It is a bit difficult to keep track of multiple questions in a single discussion... As you can see in - the last section of - my previous response: I have never tried that before. Should need to find some time to test it before I can answer your question. Unless somebody else has already used it, and can answer ...

On the SVG node's readme page you can find the reset option in this demo flow:

Seems I have forgotten to add that command explicitly in the list of commands on the readme page. Will add that later. My time is up for this evening...

Thanks again - plenty for me to investigate, one observation is -
"On a touch screen the first double tap will trigger zooming in. The second double tap will trigger zooming out. And so on ..".
For me double tap zooms in but second double tap does nothing, And so on ..

Had a quick look at the code:

image

Seems it searches (in case of command "set_attribute") for the specified selector in all the SVG elements in the entire subtree below the rootDiv. And since the svg element itself is also in that subtree, you should be able to set attributes also on the SVG element.

Summarized (in non-programming sentences :wink:):

  1. I 'think' it should work if you give the svg element itself an id, for example:

    image

  2. And then you inject a message with the following payload:

      {
         "command": "set_attribute",
         "selector": "#my_svg", 
         "attributeName": "viewBox",
         "attributeValue": "0 0 900 710"
      }   
    

Would be helpful if you could test it and give me some feedback!

Don't know that either. Will need to find some time to test it.

I'm off to bed. Much too late again ...

Hi @smcgann99,

I have implemented some changes on Github (not on NPM yet). This version can be installed when being inside the .node-red folder:

npm install bartbutenaers/node-red-contrib-ui-svg
  • A new section about reset-panzoom-via-msg has been added to the readme page.

  • The double click bug should be fixed. That was a tough one to debug :nauseated_face:. Note that I have change the behaviour a bit when using a mouse: first doubleclick is zoom-in, second doubleclick is zoom-out, and so on... Previously the behaviour was: zoom in on every double click, and zoom-out on every shift-double click.

    Reason: then the double mouse click behaviour is identical to the double tap behaviour (on a touch screen)....

  • It is indeed possible to manipulate the viewbox. Here is a demo that demonstrates how to implement panning/zooming via the viewport (see the viewbox dimensions in the status of the function node!):

    [{"id":"c30ba0d2.944f5","type":"ui_svg_graphics","z":"42b7b639.325dd8","group":"9f79dbed.57aad8","order":1,"width":"5","height":"5","svgString":"<svg id=\"my_svg\" width=\"200\" height=\"200\">\n  <ellipse cx=\"100\" cy=\"100\" rx=\"20\" ry=\"20\"></ellipse>\n</svg>","clickableShapes":[],"javascriptHandlers":[],"smilAnimations":[],"bindings":[],"showCoordinates":false,"autoFormatAfterEdit":false,"showBrowserErrors":false,"showBrowserEvents":false,"enableJsDebugging":false,"sendMsgWhenLoaded":false,"outputField":"","editorUrl":"http://drawsvg.org/drawsvg.html","directory":"","panning":"disabled","zooming":"enabled","panOnlyWhenZoomed":false,"doubleClickZoomEnabled":true,"mouseWheelZoomEnabled":false,"name":"","x":720,"y":1220,"wires":[[]]},{"id":"efa982c7.dfa0b","type":"inject","z":"42b7b639.325dd8","name":"Right","props":[{"p":"payload"}],"repeat":"","crontab":"","once":false,"onceDelay":0.1,"topic":"","payload":"right","payloadType":"str","x":270,"y":1340,"wires":[["59cf5ca9.21d7e4"]]},{"id":"8fba0775.167218","type":"inject","z":"42b7b639.325dd8","name":"Zoom in","props":[{"p":"payload"}],"repeat":"","crontab":"","once":false,"onceDelay":0.1,"topic":"","payload":"zoom_in","payloadType":"str","x":270,"y":1380,"wires":[["59cf5ca9.21d7e4"]]},{"id":"be5bacc0.05272","type":"inject","z":"42b7b639.325dd8","name":"Zoom out","props":[{"p":"payload"}],"repeat":"","crontab":"","once":false,"onceDelay":0.1,"topic":"","payload":"zoom_out","payloadType":"str","x":280,"y":1420,"wires":[["59cf5ca9.21d7e4"]]},{"id":"5c162723.a82398","type":"inject","z":"42b7b639.325dd8","name":"Left","props":[{"p":"payload"}],"repeat":"","crontab":"","once":false,"onceDelay":0.1,"topic":"","payload":"left","payloadType":"str","x":270,"y":1300,"wires":[["59cf5ca9.21d7e4"]]},{"id":"30b30e0d.8cdde2","type":"inject","z":"42b7b639.325dd8","name":"Down","props":[{"p":"payload"}],"repeat":"","crontab":"","once":false,"onceDelay":0.1,"topic":"","payload":"down","payloadType":"str","x":270,"y":1260,"wires":[["59cf5ca9.21d7e4"]]},{"id":"14f1686a.480fe8","type":"inject","z":"42b7b639.325dd8","name":"Up","props":[{"p":"payload"}],"repeat":"","crontab":"","once":false,"onceDelay":0.1,"topic":"","payload":"up","payloadType":"str","x":270,"y":1220,"wires":[["59cf5ca9.21d7e4"]]},{"id":"59cf5ca9.21d7e4","type":"function","z":"42b7b639.325dd8","name":"Calculate viewbox","func":"// Get the previous viewbox settings from context memory\nvar x = context.get(\"viewbox_x\") || 0;\nvar y = context.get(\"viewbox_y\") || 0;\nvar width = context.get(\"viewbox_width\") || 200;\nvar height = context.get(\"viewbox_height\") || 200;\n\n// Manipulate the viewbox dimensions, based on the command in the msg.payload\nswitch(msg.payload) {\n    case \"right\":\n        // By moving the viewbox to the left, the drawing seems to go to the right\n        x -= 10;        \n        break;\n    case \"left\":\n        // By moving the viewbox to the right, the drawing seems to go to the left\n        x += 10;\n        break;\n    case \"down\":\n        // By moving the viewbox up, the drawing seems to go down\n        y -= 10;\n        break;\n    case \"up\":\n        // By moving the viewbox down, the drawing seems to go up\n        y += 10;        \n        break;\n    case \"zoom_in\":\n        // By making the viewbox larger, the drawing seems to become smaller\n        width -= 10;\n        height -= 10;\n        // Make sure the drawing doesn't move to the lower right corner\n        x += 5;\n        y += 5;\n        break;\n    case \"zoom_out\":\n        // By making the viewbox smaller, the drawing seems to become larger\n        width += 10;\n        height += 10; \n        // Make sure the drawing doesn't move to the upper left corner\n        x -= 5;\n        y -= 5;\n        break;\n    default:\n        console.log(\"Unsupported viewbox command\");\n}\n\n// Store the new viewbox dimensions on context memory\ncontext.set(\"viewbox_x\", x);\ncontext.set(\"viewbox_y\", y);\ncontext.set(\"viewbox_width\", width);\ncontext.set(\"viewbox_height\", height);\n\n// Show the viewbox in the node status\nvar viewbox = x + \" \" + y + \" \" + width + \" \" + height;\nnode.status({fill:\"green\", shape:\"dot\", text:\"viewbox: \" + viewbox});\n\n// Send a command to the SVG node, to update the viewbox dimensions\nmsg.payload = {\n     \"command\": \"set_attribute\",\n     \"selector\": \"#my_svg\", \n     \"attributeName\": \"viewBox\",\n     \"attributeValue\": viewbox\n  } \n\nreturn msg;","outputs":1,"noerr":0,"initialize":"","finalize":"","x":510,"y":1220,"wires":[["c30ba0d2.944f5"]]},{"id":"9f79dbed.57aad8","type":"ui_group","z":"","name":"Viewbox demo","tab":"d81e78f0.ebcac8","order":2,"disp":true,"width":"5","collapse":false},{"id":"d81e78f0.ebcac8","type":"ui_tab","z":"42b7b639.325dd8","name":"Home","icon":"home","order":1,"disabled":false,"hidden":false}]
    

    Note that all viewbox manipulations need to be the inverse of what you want to achieve! For example when you want to move the drawing to the left, you need to move the viewbox to the right ...

    P.S. Don't confuse this viewbox panning/zooming with the CSS panning/zooming (which can be enabled in the "Settings" tabsheet).

I have added this demo to a new wiki page in the SVG node's Github repository, so other users might benefit from it...

Thanks for all your help Bart.

1 Like

Hi Sean,
Since you won't be the only one that wants to show floorplans of multiple floors (on a screen that is not big enough to show all floorplans at once), I have created a new wiki page with an extensive tutorial.

It contains a lot of background information and example flows for all the 4 mechanisms which I have described above.

Hopefully that makes it more clear what I mean...
If anybody has some more ideas, please share them here!!
Because a good floorplan is so cool for home automation freaks (like me) :wink:

Have fun with it!!
Bart

2 Likes

Bart I think there is still an issue with this, on my touch screen it only ever zooms in. Not sure exactly how its coded but it would be of more use if the zoom was centred on the click location and the amount of zoom was configurable somehow, as this would help a lot with small scale plans.

Bart,

Sorry to bombard you but I forgot to mention -
what are the co-ordinates based on with -

"command":"zoom_by_percentage","percentage":300,"x":300,"y":30}

As the view changes depending on the screen resolution. This means I cannot use a preset button for a particular view as each browser needs different co-ordinates to suit the screen resolution.

I guess we would need to "read" the screen resolution from the connected browser and the calculate the coordinates on the fly - no idea how to do this though :grimacing:

Sean

Can you explain a bit more in detail (e.g. which steps you execute and which coordinates you get/expect at every step). Like e.g. a preset button. Is that to undo the previous step, or to go to some preset position, or...

By looking at my code, I have no idea what could cause that. It is only two lines of code, so cannot imagine what goes wrong. And I have tried it with Chrome on my Android phone, and it indeed works fine. So you are sure that you have installed my version from Github? Could it be that you are still using the npm version, e.g. because you have installed the Github version not in your .node-red folder?

My bad - I forgot to restart node red!
However is it possible to implement my other points ?
"zoom was centred on the click location and the amount of zoom was configurable somehow"

So I have just one button, set to send the following - {"command":"zoom_by_percentage","percentage":300,"x":300,"y":30}

On my 1920 X 1200 tablet this zooms in to a part of my floor plan I want to see.

I had to guess the coordinates btw as the " Show mouse coordinates (as tooltip)" figures are drawn underneath the floorplan so I cannot see them.

If I use this same button on my desktop it zooms to a different location, this is starting from the same fully zoomed out view. The location shown is related to resolution / aspect ratio / DPI ?

On the desktop I inspected the page code after sending the zoom command and could see the transform numbers as follows -

2560 X 1440 scale(3) translate(690.3px, 299.333px)
2048 X 1152 scale(3) translate(487.067px, 299.333px
1920 X 1440 scale(3) translate(452.078px, 299.333px)
1920 X 1200 scale(3) translate(445.756px, 299.333px)
1920 X 1080 scale(3) translate(445.756px, 299.333px);
1440 X 900 scale(3) translate(267.089px, 299.333px)
1280 X 800 scale(3) translate(245.533px, -274.633px)

If you just change your screen resolution and check what you see after sending the same command you may see what I mean. Hope this makes sense ?

Sean

Did an experiment yesterday, but the zooming was not accurate enough. Will need to find some time to play with it.

Are they never visible, or do they disappear sometimes behind specific objects or ...
I have never experienced that behaviour. Which OS, browser, ... are you running?
Some other tips that can be of any help?

Will have a look in a couple of days. Have some other things to do, like e.g. to learn for my daily job. Have to admit that I cannot keep up with this amount of questions in my very limited free time ...

Bart,

Don't feel any obligation to respond quickly, I was just providing some feedback :wink:
I thought the zoom to click location would be a more useful way to function, as it could save the need for additional buttons etc.

With regard to coordinates tool tip, it’s always behind, both on win10 Firefox and android 10 chrome. so perhaps something different with my floor plan. I will do some experimenting to see if I can figure out what.

1 Like