Input type checkbox

I've created a custom node that handles get request oneditprepare.Does anyone maybe know how to append the results to html file as a <div class="form-row></div>

     .then((data) => {
            data.forEach((item) => {
              const divEl = document.createElement("div");
              divEl.className = "form-row";
              divEl.innerHTML = `
                <label for="node-input-checkbox"><i class="fa fa-globe"></i>${item.name}</label>
                <input type="checkbox" id="node-input-checkbox value="${item.address}"  />
                `;
              document.body.append(divEl);
              //   console.log(divEl);
              console.log(document.body);
              let elem = $("#node-input-name");
              console.log(elem);
            });
            $("#node-input-checkbox").val(this.checkbox);
          });```

Can you clarify, do you mean "add to the DOM" or do your REALLY mean "append the results to html file"?

To have something displayed when you double click on certain node u need to have it in <div class="form-row></div> Right?. My loop creates multiple <div class="form-row></div> with label and input inside.
In Vannila js where u have html file u just write document.body.append(divEl).Im wondering how it is done in node-red.Hope you understand it now.

Typically, they are standard HTML elements hard coded at design time (because as the designer, you know what fields you want to display)

However if you want dynamic fields, then you can either add them up front and show/hide them or (like Node-red mostly uses) you use JQuery.

There are lots of examples throughout node-red source - buy essentially, you first get a reference to an element within YOUR node (not document body) and then use the JQuery append or appendTo functions.

example...

var myNewInput = $('<input type="text" />');
myNewInput.on("change", function(evt) { console.log(evt) } );
var parentDiv = $("#someDivToDropTheInputInto");
parentDiv.append(myNewInput);

Additionally, node-red has several helper widgets. You might be able to use the editableList. They are used throughout node-red and contrib nodes. e.g...
WB27mx9I5v

↑ dynamically added elements - they dont have to come from an add button (its just javascript under the hood, the dynamic parts can be generated from pretty much anything)


Hope that helps

checkbox
The black lines on picture represent the <div class="form-row></div>.

          .then((data) => {
            data.forEach((item) => {
              const divEl = document.createElement("div");
              divEl.className = "form-row";
              divEl.innerHTML = `
                <label for="node-input-checkbox"><i class="fa fa-globe"></i>${item.name}</label>
                <input type="checkbox" id="node-input-checkbox value="${item.address}"  />
                `;
              let test = document.querySelector(".test");
              document.body.append(divEl);
              console.log(document.body);
            });
            $("#node-input-checkbox").val(this.checkbox);
          });
      };

      fetchURL();
    },
  });
</script>

<script type="text/html" data-template-name="datapoints">


            <!--                    I want my for loop to display 
                    
                <div class="form-row">
                    <label for="node-input-checkbox"><i class="fa fa-globe"></i>${item.name}</label>
                    <input type="checkbox" id="node-input-checkbox value="${item.address}"  />
                </div> 
                                    for everyitem in array. 
                                    And i want them to be displayed on the black lines that you see in the picture.
            -->

  
  <div class="form-row">
    <label for="node-input-name"><i class="fa fa-tag"></i> Name</label>
    <input type="text" id="node-input-name" placeholder="Name" />
  </div>
  <div class="form-row">
    <label for="node-input-server"><i class="fa fa-tag"></i> Server</label>
    <input type="text" id="node-input-server" placeholder="https://" />
  </div>

Check commented code in the script.

Have you tried the example I gave you?
Have you looked at the JQuery documentation?


So, in your code, it looks like you are trying to add a form-row with a label and input for each item in data

For starters, never specify an fixed id when creating html elements (you will have duplicates!)

Based on the example I gave you, this should get you close (100% untested off the top of my head)...

const parentDiv =  $("#someDivToDropTheInputInto"); // <<make sure this selects the DIV where you want items to go
var inputNo = 1;
// ...
// other stuff
// ...
data.forEach((item) => {
    var inputID = "node-input-dynamic-" + inputNo;
    var myNewRow = $('<div class="form-row" />');
    parentDiv.append(myNewRow); 
    var myNewLebel = $(`<label for="${inputID}"><i class="fa fa-globe"></i>${item.name}</label>`);
    var myNewInput = $(`<input type="checkbox" id="${inputID}" value="${item.address}"  />`);
    myNewRow.append(myNewLabel);
    myNewRow.append(myNewInput);
    inputNo++; 
});

---

NOTE: I re-iterate, the `editableWidget` might be a better fit.
      divEl.className = "form-row";
              divEl.innerHTML = `
                <label for="node-input-checkbox"><i class="fa fa-globe"></i>${item.name}</label>
                <input type="checkbox" id="node-input-checkbox value="${item.address}"  />
                `;
              let test = $("#dialog-form"); // This line of code made it work for me.
              test.append(divEl);
            });
            $("#node-input-checkbox").val(this.checkbox);

Now i just want to know how do i output the value of checked checkboxes.

What does that even mean?

You realise this is not a school for general HTML, javascript and JQuery questions.

there are over 4 million answers to questions like "how do i get a checkbox value using jquery"

Exactly, im asking how to make the payload value of checked boxes. That isnt general Html etc...

Again, what does that even mean.

The HTML page where the user sets up the node config (design time) is not linked to a payload. the payload is sent at run time.

Do you mean "how do i get the value of the checkbox into the server side runtime of node-red"?

  <input type="checkbox" id="node-input-checkbox" value="${item.address}"  />
// I want the value of  this input to be displayed as msg.payload if the checkbox is checked. Not
sure how to explain it differently.

"displayed as msg.payload" ? Again, not certain what you really want. That doesn't really make sense.

Perhaps if you described the outline of your nodes functionality. Your comments and questions (to me) are extremely vague and without context. Not a great combination to offer help on.

So...

Node setup (entering node details in the HTML page in the browser) has pretty much nothing to do with a payload (at the server side) UNTIL you have deployed the node and the users values/input have been registered in a variable in the runtime (server side)

I suggest you (re) read the Creating your first node page. Perhaps also, consider start with something less adventurous. Perhaps download a working contrib node & see how values in the HTML (under defaults: { }) are passed in to your js constructor.

Then once you have these values in the js side, you can node.send() all the checkbox values (in a payload) that you want, whenever you want (but usually you just node.send in the .on("input", function) handler )

I did a little research yesterday and i was completly wrong and asked for wrong things. I want when I check the boxes to have msg payload as array. For example i have Pump1 pump2 pump3, when i check lets say pump 2 i want my msg payload to be an array that says pump1 false, pump2 true, pump3 false.
Hope you understand.

Not 100%

3 Questions...

  1. What will be the trigger to fire this payload.
    • Will it fire the msg when the node is deployed?
    • Will if fire this msg when an input arrives into the node?
    • other?
  2. Why an array. If a user receives [false,true,false] how do they know this is Pump1: false, Pump2: true, Pump3: false? It could just as well be Motor 7=false, fridge=true, hamster=false. In other words, there is no context. Surely an object would make more sense than an array.
  3. Are you 100% certain you want the status of checkboxes? I mean what is the point? The user might as well use a change node and send [false,true,false];

An inject node will trigget the payload.Yeah , object does make more sense.
For example if Pump2 is checked i want it to be =>
{ Pump1:false, Pump2:true, Pump3:false }
Im using a simulator to change some values and based on those values my flow gives back different results. The idea to have this node is that i dont have to use a GET request and then function node to extract data i want to use . I want it all to be placed in this custom node im creating.
And i guess the problem ill have with this is that my for loop creates 8 divs with input inside which has the same id.

    data.forEach((item) => {
              const divEl = document.createElement("div");
              divEl.className = "form-row";
              divEl.innerHTML = `
              <input style=width:15% type="checkbox" id="node-input-checkbox"  />
                        <label for="node-input-checkbox"></i>${item.name}</label>
                        `;

I know im not making much sense but hopefully u get what i mean eventually .

ok, so firstly, as I said before...

I even went to the effort to provide an example of how to handle that...

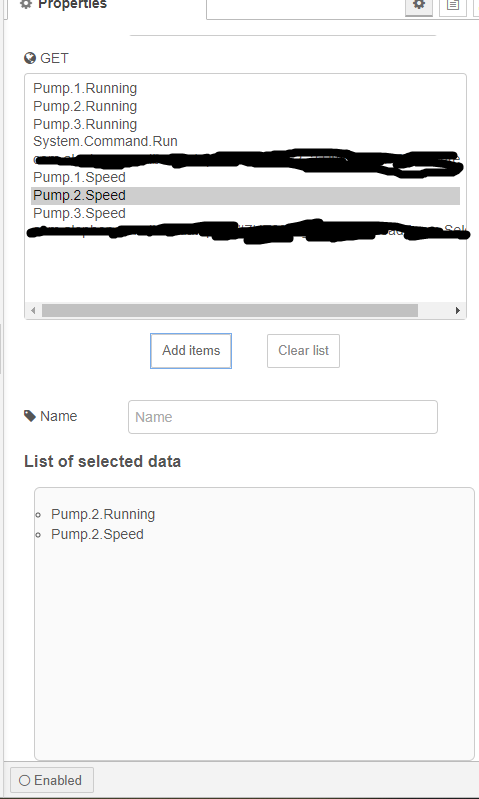
... but you have ignore it and stayed with generating objects with a fixed ID.


never mind!


A solution, take it or leave it...

NOTE: I dont know what is inside data but I can see there is at least a .name and a .address property so i will use them in my example.


STEPS...

  1. Add a property for storing client side values [client side HTML] Firstly, you need somewhere for the values to be stored (at the HTML side). Add a property to the defaults. At the beginning of the HTML node script, you will have something like the below script. Add a property called dynamicOptions.
    NOTE: this is essential if you want to get your values into the server side JS
RED.nodes.registerType('mynode', {
    category: "input",
    icon: "timer.png",
    color: "#a6bbcf",
    inputs: 1,
    outputs: 1,
    defaults: {
        name: { value: "" },
        dynamicOptions: { value: [] }, //<< Add property to hold users node settings
    },
    ...,
    

  1. Setup the dynamic elements [client side HTML] Next, you need to setup the dynamic DOM elements so that you can pick up the data values and checkbox state (when the user presses the "Done" button after editing)

// At the beginning of your oneditprepare() function...
const parentDiv =  $("#dialog-form"); // <<make sure this selects YOUR nodes DIV
var inputNo = 1;


// later on in your oneditprepare() function...
data.forEach((item) => {
    var inputID = "node-input-mynode-dynamic-" + inputNo; //generate dynamic ID
    var myNewRow = $('<div class="form-row" />');
    parentDiv.append(myNewRow); 
    var myNewLabel = $(`<label for="${inputID}"><i class="fa fa-globe"></i> ${item.name}</label>`);
    var myNewInput = $(`<input type="checkbox" class="mynode-dynamic-element" id="${inputID}" data-address="${item.address}" data-name="${item.name}" />`);
    myNewRow.append(myNewLabel);
    myNewRow.append(myNewInput);
    inputNo++; 
});

↑ NOTE how the input has data-address and data-name and a specific class? The data items will be read from the element inside oneditsave and the class name helps us read ONLY our dynamic elements. It must be unique/different to other classes in node-red.


  1. Store the values when user presses DONE button [client side HTML] Now you have DOM elements with appropriate values set, when the user presses "Done" button and oneditsave is called, itterate the items by using the class name you added to the dynamic elements, gather the values, build an array of objects, and lastly set node property you created in step1
    oneditsave: function () {
        var dynamicElements = $(".mynode-dynamic-element"); // use same class name as the dynamic DOM elements have
        var dynOpts = []; //a temp array
        dynamicElements.each( function(index,el) {
            var name = $(el).data("name"); //get value of data-name from the dynamic element
            var address = $(el).data("address"); //get value of data-address from the dynamic element
            var checked = $(el).is(":checked"); //get checked true/false from the dynamic element
            //make an object
            var opt = {
                name: name,
                address: address,
                checked: checked,
            }
            dynOpts.push(opt); //add object to array;
        });
        this.dynamicOptions = dynOpts; //update the node prop `dynamicOptions`
    }


Once you have done all the client side stuff, you should be able to access config.dynamicOptions in the constructor at server side JS...


On deploy, grab values entered at client side [server side JS]
Store the dynamicOptions passed in to the contructor somewhere you can get them later.

    function myNode(config) {
        RED.nodes.createNode(this, config);
        var node = this;
        node.dynamicOptions = config.dynamicOptions; //store config values in the node for later retreival


On msg input, set payload and send [server side JS]
when a msg arrives in the on("input" function, set payload and send the msg ...

        node.on("input", function (msg, send, done) {
            send = send || function() { node.send.apply(node,arguments) }
            done = done || function(err) {
                if(err){
                    node.error(err,msg);
                }
            };

            msg.payload = node.dynamicOptions; //set payload to your dynamicOptions
            send(msg); //send it

I passed through your explenation but i cant make it work. On a button click im adding li to ul.Here's the img of it..


But i cant make it work on edit save so that list items are there when i reopen:

Here is the code for creating li:

 const addToList = () => {
              let selectedItems = $("#node-input-options option:selected");
              selectedItems.each(function (i, el) {
                // console.log(el, i);
                let text = $(el).text();
                let val = $(el).val();
                var li = $("<li>").text(text).val(val).attr("title", val);
                list.append(li);
                li.on("dblclick", function () {
                  li.remove();
                });
                btnClear.on("click", function () {
                  li.remove();
                });
              });
            };

For now im only interested in html file . I know how to make js file work after it.

Because you need to re-populate the list upon oneditprepare from the variable you save these to in oneditsave

from your code, I cannot see where you save the selected options to.

<script type="text/javascript">
  RED.nodes.registerType("dropdown", {
    category: "function",
    color: "#be87e6",
    defaults: {
      name: { value: "" },
      options: { value: "" },
      server: { value: "" },
      datapoint: { value: "" },
      filter: { value: "" },
      list: { value: "" },
    },
    inputs: 1,
    outputs: 1,
    icon: "white-globe.svg",
    oneditprepare: function () {
      const parentDiv = $("dialog-form");
      let inputNo = 1;

      $("#node-input-options").val(this.options);
      $("#node-input-server").val(this.server);
      $("#node-input-filter").val(this.filter);
      $("#node-input-datapoint").val(this.datapoint);
      $("#list").val(this.list);

      let options = [];
      let opt;

      const fetchUrl = () => {
        let address = $("#node-input-server").val(); // Gets the value of the element and not element itself
        const port = ":22080/";
        const ip = address + port;
        const url = `some data`; // Connects to the server that we dynamically add.

        fetch(url)
          .then((res) => res.json())
          .then((data) => {
            opt = data;
            opt.forEach((item) => {
              options.push({
                //v: ``,
                v: `some value`,
                t: item.name,
              });
            });
            let selectTag = $("#node-input-options")[0];
            let elem = $("#node-input-filter");

            for (let i = 0; i < options.length; i++) {
              let value = options[i].v;
              let text = options[i].t;
              $("#node-input-options").append(
                $("<option></option>").attr("value", value).text(text) //For every element in the select tag append appropriate value and text (   <option value="#">#</option>    )
              );
            }
            const filter = () => {
              let inputEl = $("#node-input-filter").val().toLowerCase();
              // Filters options in the select tag.
              for (let i = 0; i < options.length; i++) {
                let txt = selectTag.options[i].text.toLowerCase();
                if (txt.indexOf(inputEl) > -1) {
                  selectTag.options[i].style.display = "";
                } else {
                  selectTag.options[i].style.display = "none";
                }
              }
            };
            elem.on("keyup", filter);

            const btn = $(".btn");
            const btnClear = $(".clear");
            const list = $(".list");
            const parentDiv = $("#dialog-form");
            let inputNo = 1;

            const addToList = () => {
              let selectedItems = $("#node-input-options option:selected");
              selectedItems.each(function (i, el) {
                // console.log(el, i);
                let text = $(el).text();
                let val = $(el).val();
                var li = $("<li>").text(text).val(val).attr("title", val);
                list.append(li);
                li.on("dblclick", function () {
                  li.remove();
                });
                btnClear.on("click", function () {
                  li.remove();
                });
              });
            };
            btn.on("click", addToList);
          });
      };
      fetchUrl();
    },
    oneditsave: function () {},

Here is the whole code. I deleted the parts that i messed up now. So u can easily see what should i do

You have no code in oneditsave.

Did you read my post above?